Knowing how to set a fence post without concrete can be really useful and also teaches you to choose the right materials. By avoiding concrete, you can often save money and reduce mess. Some people prefer this method because it can make future repairs or replacements easier.
In many cases, all you need is a combination of soil, gravel, and the right tamping approach to ensure your post stands firmly.
Contents
- 1 Reasons to Go Without Concrete
- 2 The Best Method to Set a Fence Post Without Concrete
- 3 Essential Tools and Materials
- 4 Step-by-Step Setup With Soil and Gravel
- 5 Additional Fence Post Installation Tips
- 6 Optional Materials and Alternatives
- 7 Considerations for Different Fence Types
- 8 Guarding Against Long-Term Shifts
- 9 Dealing With Difficult Soils
- 10 Long-Lasting Stability
- 11 Wrapping Up the Project
Reasons to Go Without Concrete
Installing a fence post with simpler materials has its own unique advantages. One big plus is the freedom to remove or adjust the post in the future with less effort. You skip the hassle of breaking up hardened concrete if you ever decide to reposition that post or replace a rotted section. It’s also friendlier for the environment since non-concrete materials often consist of plain dirt or gravel.
Another benefit is better drainage around the post base. When water collects and freezes inside an unsealed hole, wood can rot faster and metal posts can weaken. If you install your fence post without concrete, the gritty fill allows moisture to pass through more readily, reducing long-term damage.
Can It Work for All Soil Types?
Different soil types present different challenges. When the ground is loamy or sandy, a simple gravel-and-dirt fill often does the trick. Clay-based soil requires extra attention because it can swell and contract.
Still, as long as you tamp properly and ensure good drainage, you can expect a secure post in a range of conditions. If you’re installing fence posts in rocky soil, you might find you need to dig carefully to avoid damaging your tools and to create a stable hole.
The Best Method to Set a Fence Post Without Concrete
People often ask which approach is most effective when they want to skip the concrete step. The best method to set fence post without concrete is a two-part fill system of gravel first, then tamped soil on top. Gravel allows water to drain away from the bottom. Solidly packed dirt near the surface locks the post in place. This strategy keeps the post tight and reduces wobbling over time.
Filling the bottom third of the hole with gravel is a common practice. You add a few inches of gravel, place the post, then fill around it with more gravel until you hit ground level minus a few inches. Afterward, you switch to a well-compacted soil mix, tamping down in small increments. This layering ensures your fence post won’t shift the morning after a heavy storm.
Essential Tools and Materials
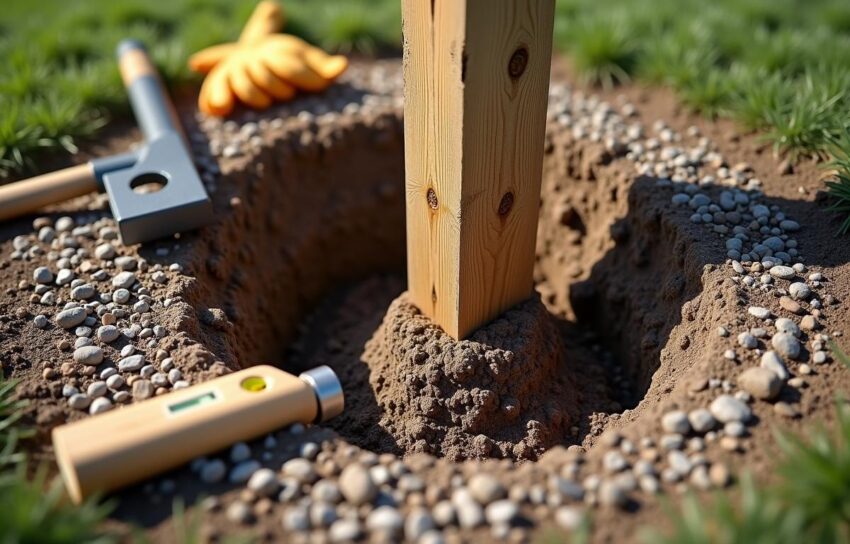
Before you begin, take note of the must-have items on your shopping list. Start with a post hole digger or auger, along with your measuring tape and a level. You’ll also want gloves and a sledgehammer for tamping. Having the right tools needed for setting fence posts without concrete ensures the process goes smoothly.
It’s also a good idea to have at least two different backfill materials: coarse gravel and the native soil you removed, if that soil has decent structure. You’ll need enough gravel to fill at least one-third of each hole. Keep a garden hose handy so you can moisten the soil if it’s too dry to compact effectively.
Checking Post Quality
A straight and sturdy post helps prevent problems down the road. Check your post for splits or warping before placing it in the ground. If you see deep cracks, consider swapping it out for a better option to prevent issues like leaning or breakage later.
Step-by-Step Setup With Soil and Gravel
Here’s a quick overview of how you might tackle the job. First, measure where you want your post, and mark the spot using some temporary paint or a stake. Next, dig your hole to the appropriate depth, which usually means around one-third of the total post length is buried.
Once you have your hole ready, add some gravel at the base. Position your post in the hole, and use a level to check that it’s upright. Add more gravel until you’ve filled around a third of the hole. At that point, pour or shovel in the soil. Periodically tamp with a sledgehammer or a heavy tamping tool every few inches. This step-by-step guide for setting fence posts with compacted dirt helps ensure a snug fit that resists movement.
Fine-Tuning the Post’s Position
You may notice your post leaning one way or another as you add soil. Stop, adjust, and keep an eye on the level. Small tweaks at this stage make a big difference in long-term stability. Once you’re satisfied with the post’s alignment, add a final layer of topsoil to fill any gaps. Then, give it a final tamp to lock everything in place.
Additional Fence Post Installation Tips
Settling can occur in the first few weeks. If you see the soil sinking slightly around your post, add more dirt and tamp again. Fences, whether wooden or metal, need strong tension in the posts to stand firm. With this technique, you typically can prevent a fence collapsing by keeping the post steady from the start. Strong posts are the backbone of the entire fence line.
In situations where you want a cleaner look, you can mound soil around the top at a slight slope. This tiny hill directs water away from the post, further protecting it from moisture. In addition, if you’re planning something like a gate, be mindful that gateposts endure more stress. This might call for deeper holes or an additional layer of gravel to improve stability.
Optional Materials and Alternatives
You might see many references to different backfill materials. Some homeowners prefer to use expanded foam or polymer-based fillers. These are alternatives to concrete for fence posts, and they can be lightweight and easy to handle. However, they often come at a higher cost, and not every hardware store carries them. If you want a budget-friendly choice with proven results, a combination of gravel and soil is hard to beat.
When building a rustic barrier, split rail install basics usually match well with non-concrete methods. These rails don’t always need a rugged foundation, and the posts can be swapped out more easily. Keep in mind that for heavier fences, a firmer foundation might be necessary, so weigh your fence style and long-term needs.
Considerations for Different Fence Types
Every fence style has subtle differences in installation. A wooden privacy fence, for instance, depends on heavier posts to hold up taller panels. Meanwhile, chain-link fences require tension in the metal rails, so the posts must stay exceptionally stiff.
If you want aluminum fence mounting tips, remember that these fences are lighter and often come with bracket-based systems. The posts should still be set firmly, but the overall load can be a bit less demanding on the foundation.
Those who prefer a rustic look might consider simpler designs like split-rail. Others who want a sleeker appearance may go with metal or vinyl. In each scenario, the basic principle remains the same: dig deep enough, fill the base with gravel, and compact the surface soil thoroughly.
Guarding Against Long-Term Shifts
One of the main risks over time is gradual leaning or sinking. Heavy winds, ground movement, or consistent rain can loosen the soil around your post. This is where you can appreciate the pros and cons of gravel for fence post installation.
Gravel does an excellent job of draining water, preventing rot, and reducing frost heave. However, it requires diligent packing and might set you back a few extra minutes of tamping compared to standard concrete.
If you live in a region with frequent freeze-thaw cycles, inspect your posts regularly. Ground movement can nudge them out of place over the winter. A quick fix in spring might involve topping off the soil and tamping again. By being proactive, you’ll keep your fence upright for years.
Simple Maintenance Matters
Beyond occasional filling and tamping, routine checks can be minimal. At times, check for rotting at the base of wooden posts. If any post starts to wobble, remove some soil and see if more gravel or tamping is required. These minor steps are key if you want to prevent major headaches down the road.
Dealing With Difficult Soils
Certain soils can be tricky, but the same principles apply. Clay soil requires you to be careful with drainage. If you’re dealing with an area prone to heavy rains, mix in some coarse sand or gravel to prevent water buildup. For extremely sandy soil, install deeper posts or brace them to avoid shifting. You can also consider alternative methods to concrete in setting fence posts, like polymer foams when the ground is very soft.
Rocky terrain may call for specialized digging tools or a larger hole to maneuver around stones. Even so, once you manage to carve out enough space, tamped gravel and dirt can anchor the post effectively. Just keep a sturdy shovel, a pinch bar, or a digging bar around to loosen tough spots.
Long-Lasting Stability
A properly installed fence post becomes the foundation for a successful fence. By focusing on consistent tamping and ensuring proper drainage, you reduce the odds of your post budging out of position. Keep in mind that fence designs vary, but the principle of stability remains universal. If done right, you can enjoy the fence for many years without worrying about major shifts.
Of course, it’s never a bad idea to take one last look with a level after the fence panels are attached. That final check can save you from any unexpected tilting. Make minor corrections during this stage or just after, and you’ll have an attractive barrier that stands up to wind and weather.
Wrapping Up the Project
Now that you’ve learned these fence post installation tips, you’re well on your way to building a sturdy structure. You’ve seen how layering gravel and soil can secure your posts effectively. You also know how to deal with different fence types and soils. Each step, from choosing materials to final tamping, plays a role in ensuring the post stands strong for a long time.
Most importantly, this approach gives you flexibility. When you avoid concrete, you can swap out or adjust posts with less hassle. It’s an adaptable method that benefits both small fences and larger projects.
By following these steps, you’ll have the confidence to try this installation method for your own backyard or property. And over time, you’ll see that simple preparation goes a long way in keeping your fence line upright and attractive.