While installing this type of fence might seem daunting, understanding how to install split rail fence simplifies the process. This classic style blends well with various landscapes and offers a rustic charm.
Before you dive into the work, it helps to plan your layout, gather the right materials, and understand the basic steps. In the following sections, you’ll find useful tips on spacing posts, digging holes, and securing rails. By the end, you’ll see how a little preparation goes a long way toward building a sturdy and attractive fence.
Contents
- 1 Benefits of a Split Rail Fence
- 2 Materials and Basic Tools
- 3 Planning Your Layout
- 4 Digging and Setting the Posts
- 5 Installing the Rails
- 6 Adding Gates and Special Features
- 7 Maintenance and Cost Factors
- 8 Evaluating Professional Help
- 9 Additional Considerations and Variations
- 10 Ongoing Care and Enjoyment
Benefits of a Split Rail Fence
Split rail fences add a country feel to any property, which many people find appealing. These fences also have few components, making construction easier for beginners. They can define a boundary or highlight a garden area without obstructing the view.
Wood rails lend a welcoming tone to paths, driveways, and front lawns. On top of that, they often cost less than other fence styles due to simpler designs.
Choosing the Right Fence Style
It’s important to decide how many rails each fence section will have. Common options include two-rail, three-rail, or even four-rail configurations. A three-rail version works well if you need a bit more height for privacy or containment. You might also consider customizing the post tops or rail ends for an added aesthetic twist. Taking time to pick a style that suits your home helps ensure you love the finished look.
Materials and Basic Tools
You’ll want to collect the proper materials needed for split rail fence so the job goes smoothly. Typical items include fence rails, pressure-treated or cedar posts, gravel or concrete mix, and connectors if the fence style requires them.
Ensure you have a measuring tape, digging tools, and a level as well. A post hole digger can save time and help you achieve consistent depths. Keep in mind that some hardware stores sell everything pre-bundled, which gives you a convenient starting point.
Helpful Supplies and Equipment
If you prefer more modern solutions, a power auger can make digging holes significantly faster. For safety, grab protective gear like gloves, work boots, and safety glasses. It’s wise to mark your utility lines beforehand to avoid accidental interference with pipes or cables.
Maintaining a checklist ensures you don’t forget smaller necessities such as fasteners or support stakes. When it’s all in one place, you can work with fewer interruptions.
Planning Your Layout
Think about where the fence will sit on your property and check your boundary lines. Mark off your corners first, then decide how many posts you’ll need based on your chosen fence style. A split rail fence installation guide usually recommends spacing posts between six and ten feet.
Keeping that range ensures the rails have enough support and remain stable over time. Mark each post location with stakes or spray paint so you have a clear reference.
Checking Local Rules
Always research local building codes or HOA requirements. Some neighborhoods limit fence height or set guidelines on style. You may need a permit if your fence is above a certain height or near a street. By confirming these rules early, you can avoid fines or forced modifications later. Keeping all official paperwork in order makes the project more enjoyable and stress-free.
Digging and Setting the Posts
Once your layout is marked and approved, you can start digging. Aim for holes that are about a third of the post’s total length. If you’re installing a three-rail fence, posts generally need to stand around four to five feet tall, so holes can go down about two feet. This depth adds stability, prevents tilting, and helps the fence withstand various weather conditions.
Adding Concrete or Gravel
Many homeowners use gravel at the bottom of each hole for drainage, followed by concrete around the post. You can skip concrete and only use gravel if the soil is firm and the fence is mostly decorative. Whichever route you choose, tamp down the base to keep the posts in place. Ensure the posts are plumb using a level or by eyeballing from multiple angles.
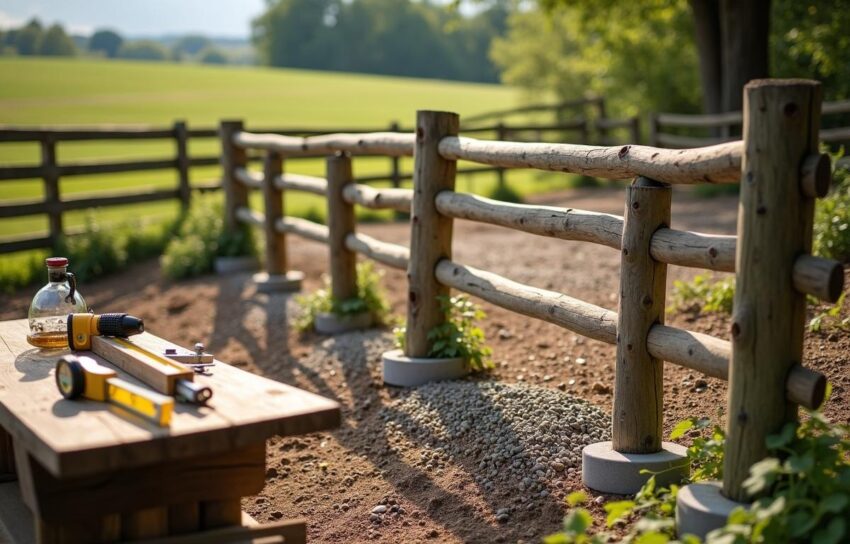
Installing the Rails
After the posts are set, you can slip the rails into place. Most split rail designs have pre-cut holes in the posts that slide onto the rails. Adjust each rail to fit snugly while maintaining a consistent top line. If you prefer a tighter look, you can use wooden wedges or screws to secure them in place. Double-check that each section lines up evenly before moving to the next.
Tips for Alignment
It’s smart to step back every so often to look at the fence as a whole. Small corrections along the way prevent larger fixes at the end. A string line helps you keep rails aligned and maintain a straight or gently curving fence line. If you notice sagging or twisting, remove the rail and try a different angle to get the best fit. By investing time in alignment, you end up with a smoother result.
Adding Gates and Special Features
If you plan to add a gate, pick a sturdy post to act as the hinge support. Gates can be a single or double swing style, depending on your preference. Consider whether you’ll drive equipment through the fence line or only walk through. For vehicles or larger equipment, a larger span may be necessary, whereas a small gate does just fine for foot traffic.
In case you’re planning on two swinging sections, keep in mind a few double fence gate tips. Strengthen the gate posts with extra concrete or steel brackets to hold heavier gates. Installing a latch that aligns properly with both gate panels will also keep them secure when closed. By laying out these details early, you’ll avoid hassles and crooked gate issues down the road.
Maintenance and Cost Factors
When figuring out the cost to install split rail fence, you’ll want to consider material price, labor, and any extra touches like sealants or decorative caps. Fence length and the type of wood you choose also affect your budget.
Cedar posts often cost more than pressure-treated pine but can last longer under certain conditions. You can also factor in occasional maintenance, such as staining or replacing rails. Doing a bit of research on prices can help you stay on track financially.
Considering Long-Term Care
Wood fences benefit from periodic sealing and inspection. If you use a stain or water-repellent product, you can extend the fence’s life. Keep an eye out for rotted rails or wobbly posts and repair them quickly to avoid bigger issues.
A little upkeep each year helps you preserve both the appearance and functionality. This routine care keeps your fence in great shape and protects your initial investment.
Evaluating Professional Help
Building a split rail fence often fits well into a weekend project, but in some cases, you might want extra help. If your property is very sloped or has rocky soil, it could be more challenging. Hiring professionals for fence installation may cost more, but it often saves time and guarantees a well-built structure. Some companies also include warranties for workmanship. If budget allows, a pro touch can spare you potential headaches.
Balancing DIY and Specialists
Some homeowners start by gathering the best tools for installing split rail fence themselves. If you’re handy and enjoy a challenge, you’ll likely find satisfaction in a DIY approach. But if you begin and realize it’s more than you bargained for, bring in a crew to finish the job. In some situations, a half-DIY method works too: dig the holes yourself, then let professionals handle final assembly. This blend cuts costs but still achieves a polished look.
Additional Considerations and Variations
Early in the planning phase, you might rely on a split rail fence cost estimator to gauge the full scope of the project. A tool like this can give insight into how different wood types, post spacing, or decorative add-ons affect budget.
If you’re aiming for a faster approach, a DIY split rail fence kit simplifies your shopping list. That option might also come with instructions tailored to your chosen style. Every property has unique details, so adapt these ideas to fit your specific situation.
Rethinking Fence Placement
Split rail fences don’t have to outline your entire lot. They can serve purely decorative purposes near a mailbox or garden area. Short segments can help you define walkways or accent flower beds. Some people also combine them with wire mesh for extra security without losing the rustic look. Feel free to be creative and think about how each section can enhance your yard.
Ongoing Care and Enjoyment
Once your fence is in place, giving it an annual review goes a long way. Look for any slight shifts or loose rails that need a quick fix. If you notice discoloration, a coat of sealant or stain will refresh the wood’s color. Before long, you’ll have a fence that stands proud and frames your property in a warm, welcoming way. Sparing a weekend each year for small touch-ups can keep your fence looking amazing for years.
Looking Ahead
When you’ve mastered the basics of building one fence, you might decide to expand. Adding sections or matching gates to different parts of the property can bring a cohesive style. Maybe you’ll replace older fences on your land with new split rail versions. You might also decide to integrate decorative elements like flower boxes or climbing plants. These choices let you get even more creative with your outdoor space.
By tackling each step methodically—planning, digging, setting posts, and adding rails—you’ll see your fence come together smoothly. Split rail fences offer a welcoming look, practical boundary, and relatively easy maintenance. If you stay organized, you’ll be proud of the effort and enjoy the new addition for years to come.